In my quest to remove all php code from my site, it was time to get rid of Wordpress. don’t get me wrong, Wordpress is a great platform and is extremely useful for many different applications, but does feel very heavy for how I use it - as a simple blog. I use minimal plugins, and really only wanted a secure platform to share my thoughts and interests quickly.
Searching for a replacement
I looked into Ghost, and really thought that this would become my new blogging platform. But soon discovered that actually getting it installed onto my Centos 7 VPS was virtually impossible. Or at least difficult enough to install that it overrode any benefits it might have. A real shame, because it does look very nice.
Jekyll
Next up was Jekyll - a Ruby on Rails app, which I did actually use for a few days in a round about way. I just couldn’t seem to get Jekyll installed into my VPS. It has a quirky install process which also proved to be too much effort to install on my Plesk server. So I wound up building the site on my laptop with Jekyll, and uploaded the compiled site manually. I was actually pretty happy with this setup, but thought that there must be a better way.
Hugo
I ended up reading how some other bloggers were using Hugo, and figured I’d give it a shot. I was pleasantly surprised at discovering how simple it was to setup on both my laptop and my server. I was even happier to discover an active support community, and many many prebuilt open source themes. I quickly set about migrating both my company blog, and then my personal blog over to Hugo. Heres how i did it.
Migration
First up was exporting all Wordpress blog posts into the markdown format supported by Hugo. That was super easy with a Wordpress plugin:
https://github.com/SchumacherFM/wordpress-to-hugo-exporter
Because Hugo is a written in Go, we also need to install the Go runtime. The latest versions of both Go, and Hugo can be found on their respective website:
https://golang.org/dl/
https://github.com/gohugoio/hugo/releases
Go is installed first:
wget https://dl.google.com/go/go1.11.1.linux-amd64.tar.gz
tar -xzf go1.11.1.linux-amd64.tar.gz
mv go /usr/local
rm go1.11.1.linux-amd64.tar.gz
export PATH=$PATH:/usr/local/go/bin
source /etc/profile
Then hugo:
wget https://github.com/gohugoio/hugo/releases/download/v0.50/hugo_0.50_Linux-64bit.tar.gz
tar -xzf hugo_0.50_Linux-64bit.tar.gz
rm hugo_0.50_Linux-64bit.tar.gz
mv hugo /usr/local/bin/
And that is pretty much it for the installation! Hugo is now ready to go, and just needs the site scaffolding a theme, and some content. Creating a Hugo site is super easy:
hugo new site myblog
There are many free themes to suit all tastes. I found one I liked and customised it a little more to my taste and dropped it into the themes folder of my new Hugo site. All thats left is to add the posts and post images. Also super easy!
The .md markdown blog posts are all dropped into the content/post/ folder. And the images are dropped into the static/images/ folder. To generate the actual site is super easy, its a single command, run from the root folder of the Hugo site:
hugo
The entire compiled site will be placed into the public folder, which If you’re running a Plesk server is easy to set as the root for the domain:
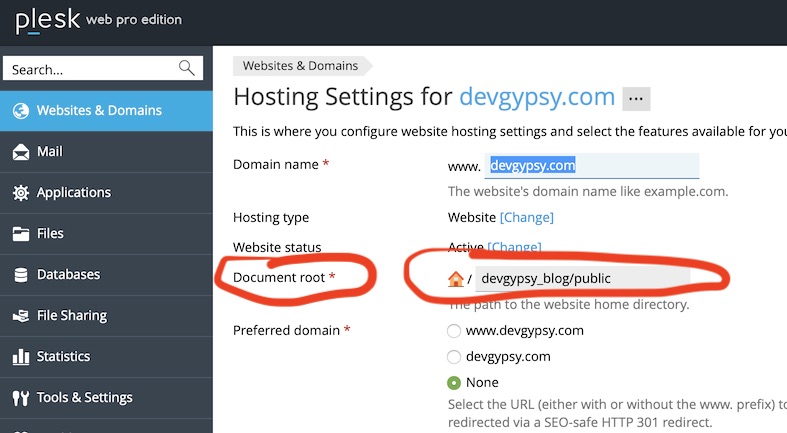 Plesk Document Root for Hugo site
Now whenever I write a new blog post, I simply upload the new .md file, and any related images then run the hugo command to recompile the site.
super easy!
👍