So I ran in to a few small issues getting an email marketing solution based on MailTrain running in Plesk Onyx. Nothing show stopping - but I figured I’d archive this here, so no one else has to waste a full day getting it all configured just right. 🙂
Email marketing - A problem in search of an answer
A little background… I’m not the best at email marketing (or social media…. etc…), but figured I should really get a little more proactive. So the first problem was how to send out a large number of emails without totally destroying my email reputation. Day one was spent researching, looking at some saas services (MailChimp, SendInBlue etc), some WordPress plugins (Newsletter, MailPoet etc) and some paid apps (Sendy). The problem with all these solutions, was that none of them were cheap (most are subscription payment based), and worse some were downright extortionate. So whats a dev to do… get on GitHub of course! A couple of apps were discovered - a Rails app, and a Node.js app. Both were tested, but I settled on the Node.js app: MailTrain.
I fired it up on my dev machine, and had it running in a matter of minutes! so far so good. even better - it had all the features I wanted already - no custom code to write - awesome! and best of all it’s free to use.
Well, what’s a MailTrain?
MailTrain
"MailTrain is a self hosted newsletter application built on Node.js (v7+) and MySQL (v5.5+ or MariaDB).
FEATURES
Mailtrain supports subscriber list management, list segmentation, custom fields, email templates, large CSV list import files, etc."
nice!
Installing on Plesk Onyx
I figured it would be super easy to install on Plesk, just like a rails app. Well, it was, mostly. But there was a couple of small issues I ran into which had me going round in circles for hours… 🙁
Enable Node.js
So ok, first of all we need to enable Node.js on Plesk. super easy:
Open the Tools and Settings tab
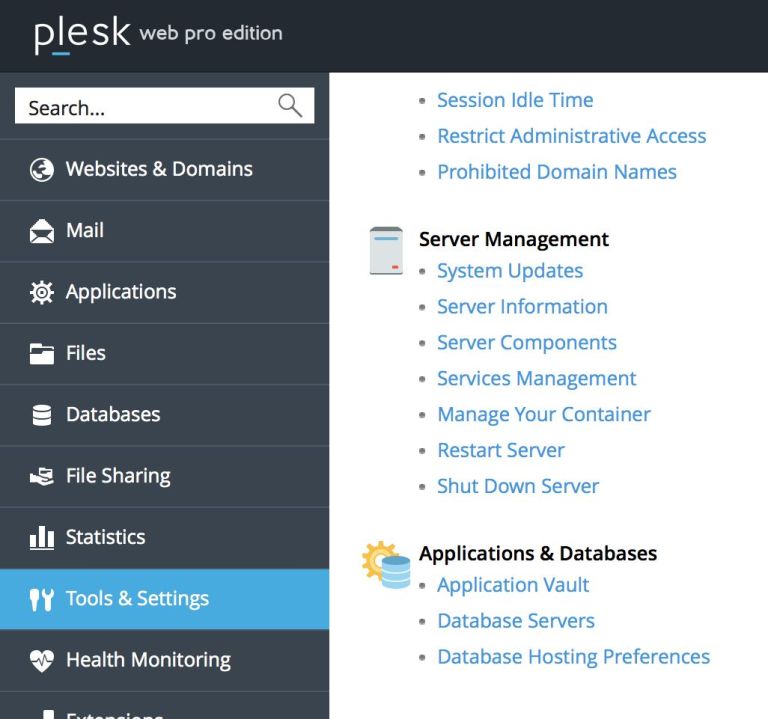 the Tools and Settings Panel in Plesk
then click on Add/Remove Components
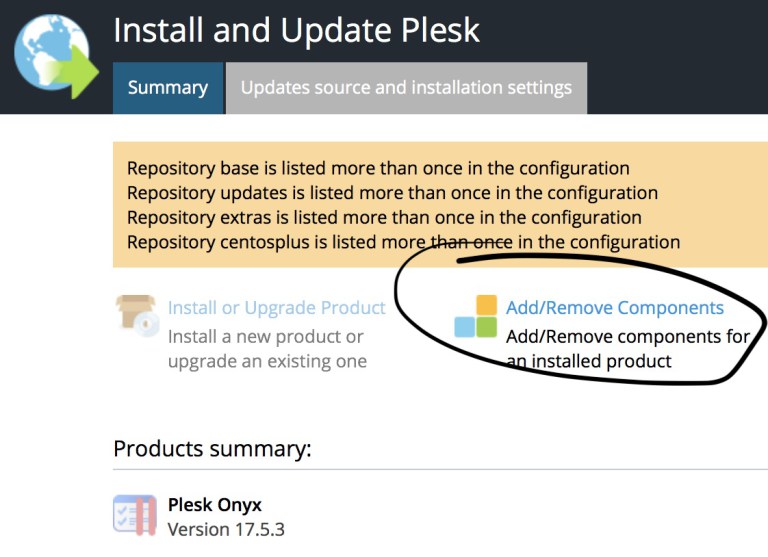 add new components into Plesk
Scroll down and expand the Web Hosting menu, then enable NodeJS support
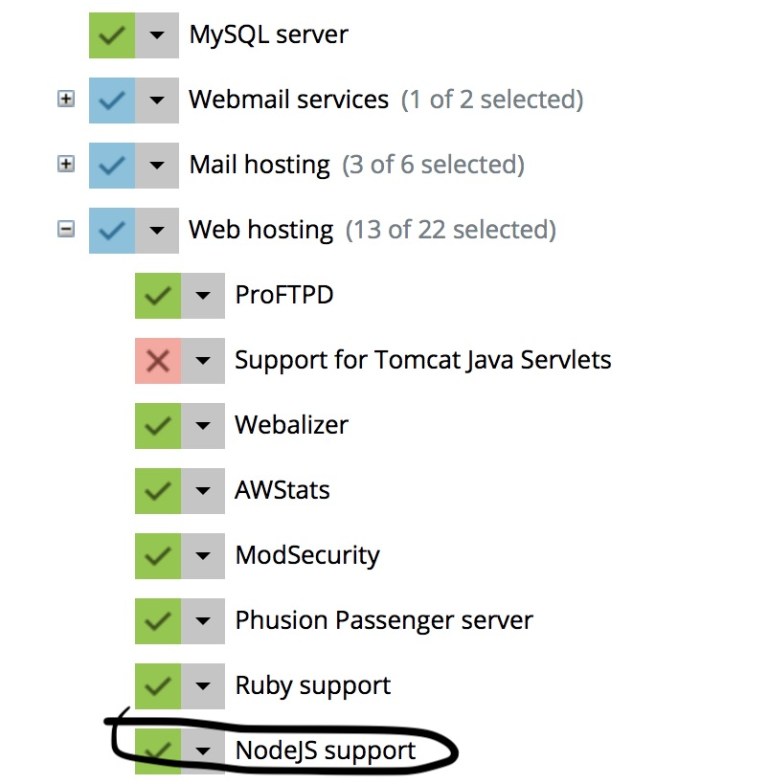 enabling Node.js support in Plesk
Crete a mysql database
Go back to the Websites & Domains tab and select your domain where you want to install MailTrain.
Click Add Database
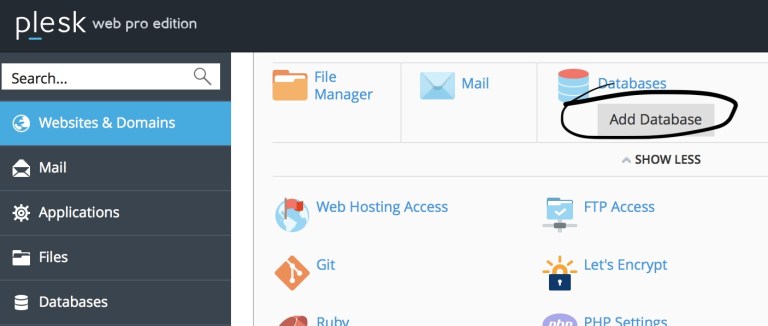 adding a new database for MailTrain
Create a new database user
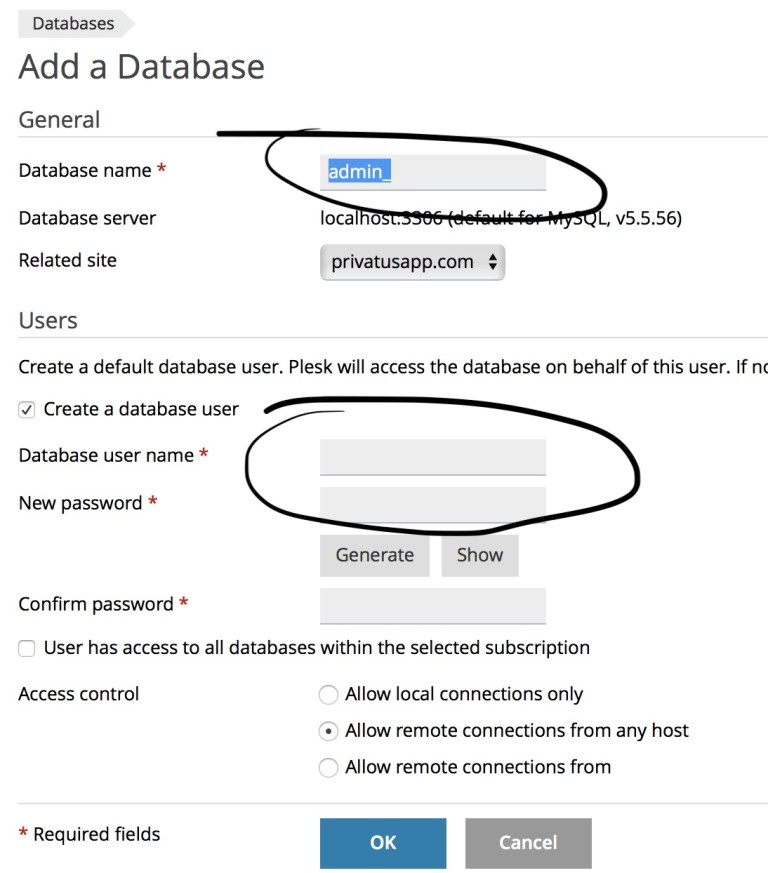 creating a new database user
take note of the Database name, user and password - we’ll need these for configuring MailTrain.
Configure MailTrain
We need to give access to the database, and this is super easy.
If you haven’t done it yet, download MailTrain from GitHub
unarchive the zip file, and navigate to the config folder
duplicate the default.toml file and rename the new file production.toml
open the newly created production.toml file and replace the contents with this:
# production.toml
[mysql]
host="127.0.0.1″
user="[[your_username]]"
password="[[your_password]]"
database="[[your_database_name]]"
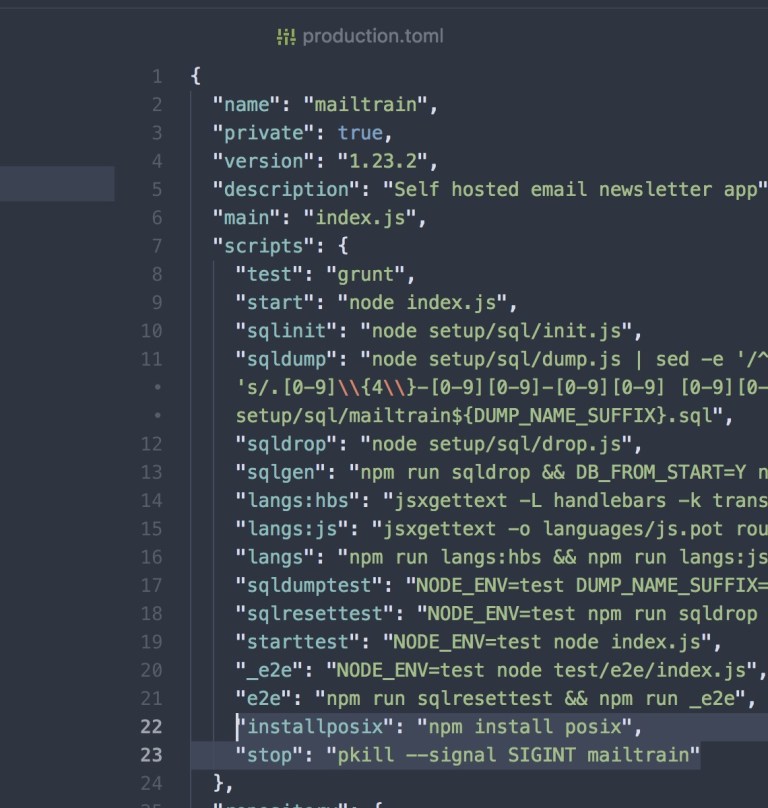
Ok, so normally this would be all we’d need to do. But I ran into an install issue, and had to add a custom script to to the package.json file.
Open up the file: package.json
add these two lines to the end of the scripts array:
"installposix": "npm install posix",
"stop": "pkill -signal SIGINT mailtrain"
The installposix script is the one we need to get MailTrain to install correctly in Plesk Onyx. And the stop script is just a convenience script.
So your package.json will look something like this:
 editing the package.json file
Cool, now we can upload MailTrain to our server.
Configure Node.js app in Plesk
click on the Node.js icon under our domain, and update the variables to this:
Document Root /[[your_domain]]/mailtrain/public
Application Mode production
Application URL http://[[your_domain]]
Application Root /[[your_domain]]/mailtrain
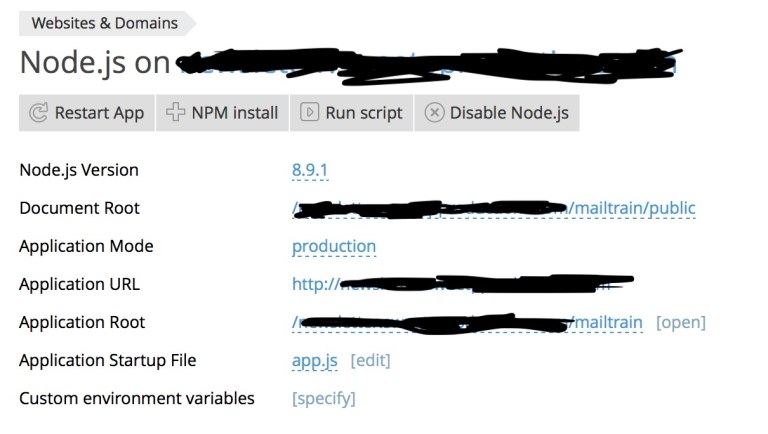 configuring the Node.js settings
We have already enabled Node.js support globally, but now we need to enable Node.js on the domain where we want MailTrain running. This is super easy (like everything in Plesk Onyx). just click the Enable Node.js button
Install all the required dependencies for MailTrain
Normally we would just hit the NPM Install button, and our app would be running! but this is where those custom script we added to the package.json file come in handy.
Click the Run Script button, type installposix in the field, and hit Run. For some reason we need to install this manually or else the build fails. once it completes dismiss the script panel and hit the NPM Install button.
We’re almost, but not quite there, and this step tripped me up for hours…
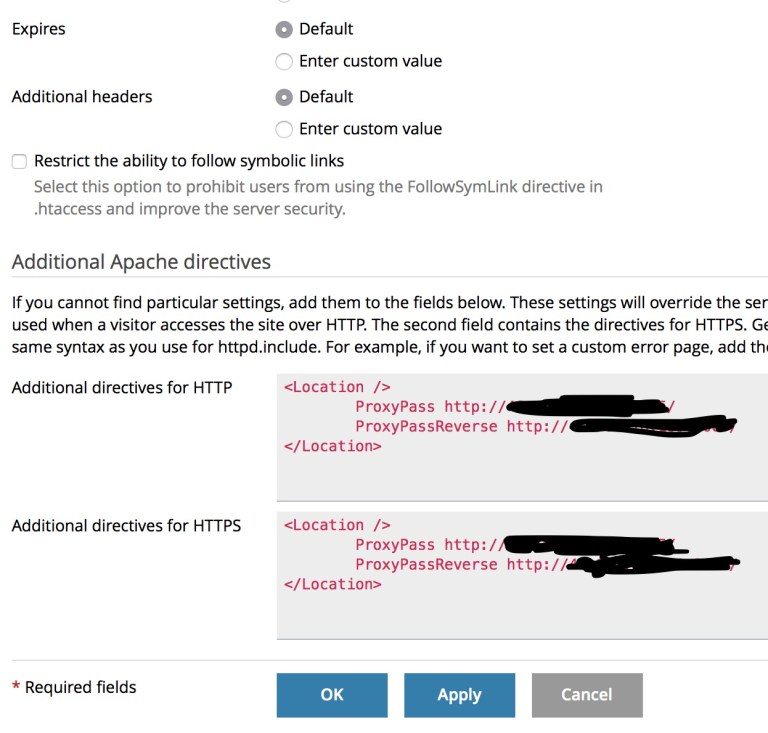
One last thing
Well actually two things….
drop back out of the Node.js settings to your domain name, and open up the Apache & nginx Settings panel. Add the following code in Both the HTTP, and HTTPS fields:
<Location />
 ProxyPass http://"your_server_IP_address":3000/
 ProxyPassReverse http://"your_server_IP_address":3000/
</Location>
hit Apply
 settings custom Apache Directives
Head back to the Node.js panel one last time. Open the Run Script panel, enter start, then hit Run. then dismiss the panel
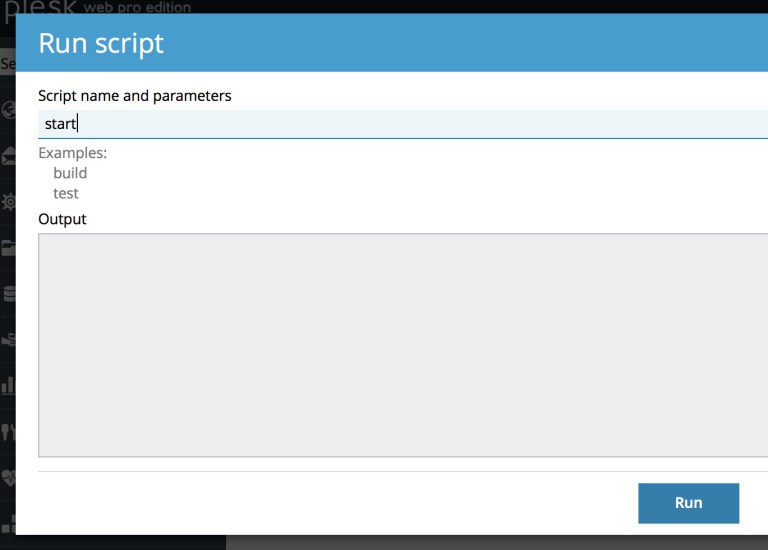 running custom scripts in Plesk for our custom Email marketing setup
Success - affordable and reliable email marketing
MailTrain should now be running on your domain!
you can get it configured to send out your newsletter by following the tutorials in the Wiki.